


You can choose whether to create the
![]() Force delete and
Force delete and
![]() File information context menus when
installing UVK or by checking the corresponding checkbox in the
Options
section. Use this context menu to delete files and folders you are
not able to delete using
the Windows explorer, or to get extended information on a file.
File information context menus when
installing UVK or by checking the corresponding checkbox in the
Options
section. Use this context menu to delete files and folders you are
not able to delete using
the Windows explorer, or to get extended information on a file.
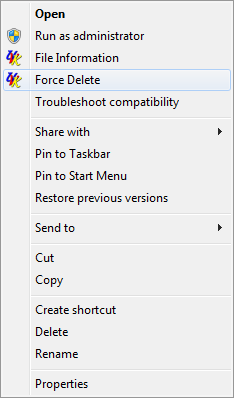
If you have created the
![]() Force delete context menu, then it will be available when right clicking
any file or folder, and the
Force delete context menu, then it will be available when right clicking
any file or folder, and the
![]() File information context
menu will be available for all files (see picture below).
File information context
menu will be available for all files (see picture below).
 Force delete context menu
 After selecting this context menu, you'll be prompted for
confirmation, as shown in the picture below:
After selecting this context menu, you'll be prompted for
confirmation, as shown in the picture below:
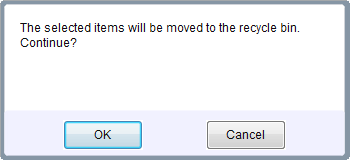
If you click No, the selected file or folder will not be deleted.
If you click Yes, it will be moved to the recycle bin as written in the message box. For running executable files, the corresponding processes will be terminated before removal.
If the selected file or folder is locked by another application, it will be scheduled for removal on reboot. A message box will be displayed like the one in the picture below:
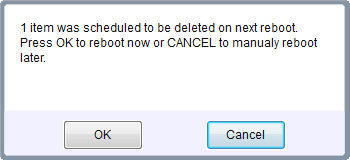
Click OK to reboot immediately or Cancel to do it manually later. After restarting your computer, you'll see a report on your desktop with details of the reboot deletion(s).
Be careful when deleting shortcuts with this feature, because it's the shortcut destination file that will be deleted, instead of the shortcut itself.
This is not a UVK bug. It's the windows shell that sends the destination path to UVK instead of the shortcut's path.
Also, if you selected several files or/and folders and used the context menu Delete with UVK on the seletion, then each selected item will open an UVK instance and will be deleted separately.
Again, this is a windows shell feature and has nothing to do with the UVK's configuration.
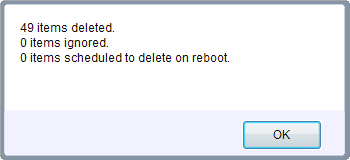
To delete several files and/or folders simultaneously, including shortcuts, select them and then drag the selection to the UVK's desktop shortcut. Then all the items will be deleted in sequence with the same UVK instance (see picture below).
File information context menu:
When you click this context menu, a dialog box like the one in the picture below will be displayed.
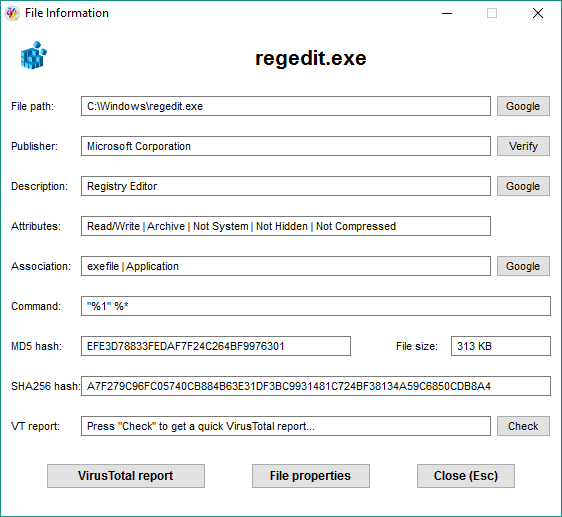
As shown in the screenshot above, the dialog box shows several information fields and some buttons to perform extra actions.
By default, the publisher displayed is not verified. Click Verify to verify it. Click the Check button to check if the file is infected using the VT api.
Click the VirusTotal report button to generate a VirusTotal html report.
Click the File properties button to open the file's properties dialog.
Click the Close (Esc) button or just press Esc to close the dialog box.
